How to design or add bookmarks for the output flip page books?
If you have large pages book, and then you make use of FlipBook Creator Pro to generate a flipping book. Have you ever thought about adding the sync bookmarks for this book in order to enable readers to quick search what chapters they go ahead. Usually we create a wrap-up father bookmarks for several big chapters of book, simultaneously build several small child bookmarks for every father bookmarks. Let’s begin to learn how to add bookmarks with FlipBook Creator Pro.
This tutorial enables you to know completely how to add father and child bookmark, how to make the bookmark button show on the output flipping book, and any detail which easily get wrong.
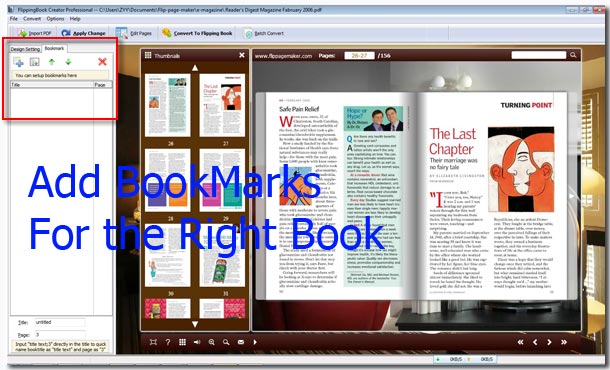
1 Insert a PDF eBook (Click button "Import PDF").
2 On the right preview interface, select a page as the start of the father bookmark, and then click button "Add", edit bookmark’s "Title" and "Page" in the below forms.
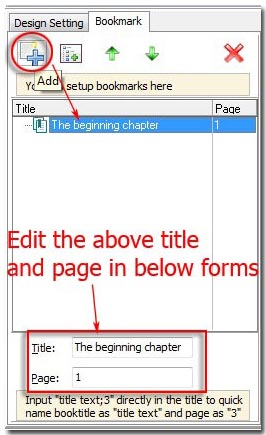
3 If the father bookmark have child bookmark, you can add child (operation is as same as adding father bookmark).
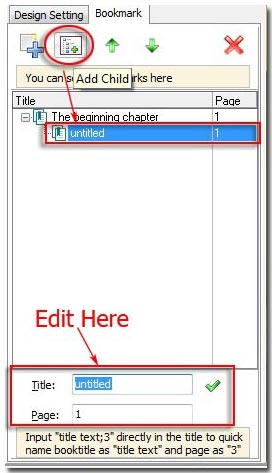
4 Also you can sort or remove the existed bookmarks, first click one bookmark and then click buttons green up-down-arrow to sort or red cross to delete.
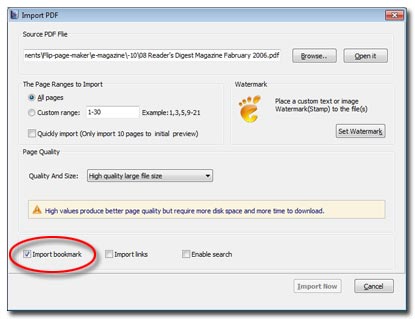
Just now we have learnt how to design bookmarks for book with FlipBook Creator Pro. And now let’s go ahead to learn how to show bookmarks on the output flipping books. Alright, you should click button "Apply change" or click button "Import PDF" on top menu bar to check the checkbox "Import Bookmark".
Do you want to setup bookmark’s font and font color? Do as below:
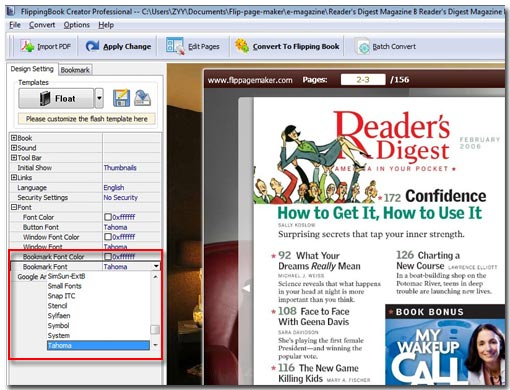
1 Click Tab "Design Setting".
2 Select "-Font".
3 Setup Bookmark Font Color or Font. (Don’t forget to click "Apply Change" on top menu bar).
